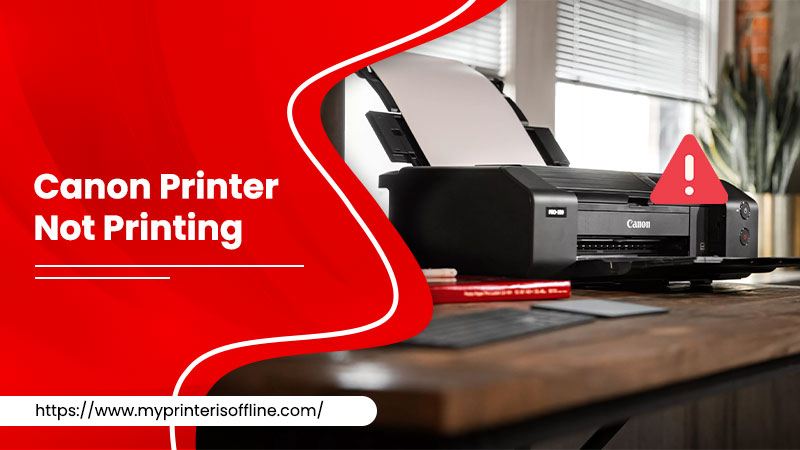
Troubleshoot the Canon Printer Not Printing with 11 Easy Methods
- Mr. Ryan
- on Sep 06, 2023
Canon printers are widely known for their quality and trustworthiness. However, like all electronic devices, they can sometimes experience issues, one of the most common being the Canon printer not printing issue. This problem can arise for various reasons, such as empty ink cartridges, paper jams, incorrect printer settings, outdated drivers, etc. It is essential to identify the root cause of the problem to apply the most effective solution. This guide provides a comprehensive overview of the different methods to troubleshoot and resolve the Canon printer issue, ensuring your printer is back up and running smoothly.
Contents
- 1 Why is My Canon Printer Not Printing?
- 2 Methods to Troubleshoot Canon Printer Not Printing Problem
- 2.1 Method 1: Check Power Connections
- 2.2 Method 2: Check the Connection Between the Printer and the Computer
- 2.3 Method 3: Inspect Ink Levels
- 2.4 Method 4: Rectify Printer Settings
- 2.5 Method 5: Update Printer Drivers
- 2.6 Method 6: Canon Printer Not Printing Black – Deep Cleaning
- 2.7 Method 7: Check the Printer Status
- 2.8 Method 8: Check Print Spooler Service
- 2.9 Method 9: Adjust Printer Preferences When Canon Printer Not Printing Color
- 2.10 Method 10: Set as Default
- 2.11 Method 11: Check & Clean Nozzles – Canon Printer Not Printing Correctly
- 2.12 Method 12: Reset Printer
- 3 Summing Up
Why is My Canon Printer Not Printing?
Many factors can be responsible for the Canon printer printing issue. These are:
- The ink cartridges may be empty or running low on ink, leading to incomplete or faded prints.
- A paper jam inside the printer could be preventing it from printing.
- Incorrectly configured printer settings could cause the printer to malfunction.
- Outdated or corrupted printer drivers could prevent the printer from communicating correctly with the computer.
- The Print Spooler Service, which manages print jobs, might not run properly.
- The computer might send print jobs to a different or virtual printer if the Canon printer is not set as the default printer.
- Loose or faulty connections between the printer and computer could disrupt communication.
- The printer might be experiencing an internal error that leads to the Canon printer won’t print issue.
Methods to Troubleshoot Canon Printer Not Printing Problem
Resolving the printing issue on Canon printers is not so difficult; for the following reasons, you can quickly fix the problem in no time.
Method 1: Check Power Connections
If your Canon printer is not printing, the first step is to ensure it is properly powered on. Check if the printer’s power cord is securely plugged into the power outlet and the back of the printer. Additionally, ensure the printer is ON; the power button should be lit. If the printer is on but still not printing, other issues, such as connection problems, paper jams, or empty ink cartridges, need to be fixed before the printer can function properly.
Method 2: Check the Connection Between the Printer and the Computer
After ensuring the power, the next crucial step is to check the connection between your printer and computer. Firstly, ensure the connection is secure. If you use a USB cable, ensure it is properly connected to both the printer and the computer. Conversely, if you are using a wireless connection, ensure the printer connects to the same network as your computer. Sometimes, the printer and computer may lose connection due to network issues or after a software update. Therefore, confirming that the connection is secure and stable is essential before proceeding to other troubleshooting steps.
Method 3: Inspect Ink Levels
If the connection between the printer and the computer is proper but still facing the Canon printer not printing, then check the ink levels. Checking ink levels regularly is essential for printer maintenance. The process involves removing and examining the cartridge, replacing it if ink levels are low or depleted, correctly reinserting it, and then printing a test page to confirm that the printer is functioning as expected. This simple routine can help prevent Canon printer not printing black or any color issues and ensure the longevity of your printer.
Method 4: Rectify Printer Settings
Improper printer settings can lead to the Canon printer not printing properly. It is crucial to check and rectify the printer settings to ensure they are correctly configured for the printing task. The following are the steps to check and rectify printer settings:
- Firstly, open the Control Panel.
- Secondly, go to Devices and Printers and find your Canon printer.
- Thirdly, right-click on your Canon printer and select Printer properties.
- From the Properties window, check the settings to ensure they are correct (e.g., paper size, orientation, print quality, etc.).
- After that, make any necessary adjustments to the settings and click OK to save the changes.
- Lastly, try printing a test page to check for the issue.
Method 5: Update Printer Drivers
The outdated printer can lead you to the Canon printer not printing color properly. Updating the drivers of your Canon printer is essential to ensure its proper functioning. Outdated drivers lead to printing issues. The following are the means to update:
- First, visit the Canon website.
- Then, navigate to the support section.
- Next, search for the latest drivers available for your specific printer model.
- After locating the correct driver, download it to your computer.
- Then, open the downloaded file and follow the on-screen instructions to install the updated driver.
- Once the installation is complete, you have to restart your computer to confirm the changes take effect.
Updating the drivers ensures that your printer can communicate effectively with your computer, thereby resolving any existing printing issues. It’s a crucial step in troubleshooting Canon printer problems.
Method 6: Canon Printer Not Printing Black – Deep Cleaning
Deep cleaning is a specialized cleaning function on Canon printers, targeting clogged ink nozzles. It works by pushing a more substantial amount of ink through the nozzles to dislodge blockages. This process, while effective, consumes more ink. It’s recommended when standard cleaning doesn’t rectify print quality issues. The following are the steps:
- Initially, turn on your Canon printer to get started with the deep cleaning process.
- Next, access the printer settings either from your computer or through the printer’s LCD panel.
- Then, navigate to the ‘Maintenance’ or ‘Tools’ menu.
- Within this section, search for the ‘Deep Cleaning’ option, which might sometimes be found under ‘Printhead Cleaning’ or ‘Clean Printhead’.
- Afterward, select the desired ink group, often designated as ‘All Colors’ or ‘Black’.
- Once selected, start the deep cleaning procedure. Remember, this might take several minutes as the printer works to remove any blockages.
- Upon completion, always ensure to print a test page or nozzle check pattern to validate the effectiveness of the cleaning.
- Finally, take note: while this process is beneficial, frequent deep cleaning can deplete your ink cartridges more rapidly. It’s best used when standard cleaning doesn’t yield results.
Method 7: Check the Printer Status
Checking the printer status is fundamental in diagnosing the “Canon printer not printing” issue. If any of these components are improper, the Canon printer will not print correctly. Rectifying these issues is crucial for the printer to function optimally.
- Initially, ensure that there is paper in the paper tray and that it is properly aligned.
- Then, check for any paper jams.
- Lastly, examine the ink or toner cartridges to ensure they are properly installed and not empty.
Method 8: Check Print Spooler Service
The Print Spooler Service is a software program responsible for managing all print jobs currently delivered to the computer printer. If there is an issue with this service, it could lead to the Canon printer not printing problems.
- Firstly, press the Windows + R keys, type services.msc, and press Enter.
- Then, locate the Print Spooler service in the list, right-click, and select Restart.
- Afterward, right-click on the Print Spooler service, select Properties, and ensure the Startup type is set to Automatic.
Restarting the Print Spooler Service and setting it to start automatically helps resolve the printing issue.
Method 9: Adjust Printer Preferences When Canon Printer Not Printing Color
If your Canon printer not printing color, then it might be set to greyscale. To set, you can go with the following steps:
- Firstly, press the Window + R.
- Type Control Panel, and then press the Enter button.
- Now, choose View Devices and Printers from the Hardware and Sound tab.
- After that, right-click on the Canon printer.
- Select ‘Properties’.
- In ‘Printing Preferences’, switch from ‘Grayscale’ or ‘Black & White’ to ‘Color’.
- Save the changes and print a test page.
Method 10: Set as Default
Ensuring your Canon printer is set as the default printer is another important step in resolving the Canon printer not printing issue. Sometimes, your computer may send print jobs to another printer or virtual printer, which could be the reason behind the Canon printer not printing issue. By setting your Canon printer as the default, you ensure all print jobs to the correct printer.
- Navigate to the Control Panel and select Devices and Printers.
- Then, right-click on your Canon printer and select Set as the default printer.
Method 11: Check & Clean Nozzles – Canon Printer Not Printing Correctly
Clogged nozzles in Canon printers can hinder print quality. By accessing the maintenance menu and performing a printhead cleaning, users can often rectify issues and restore clear, high-quality prints. Regular maintenance is key to avoid the Canon printer not printing properly. The following are the steps:
- First, ensure your Canon printer is powered on.
- Next, navigate to the printer settings on your computer or through the printer’s LCD panel and access the ‘Maintenance’ or ‘Tools’ menu.
- Before proceeding further, print a nozzle check pattern to assess which colors or the black ink are affected.
- Then, select the ‘Clean’ or ‘Printhead Cleaning’ option in the menu, initiating the cleaning process, which may take a few minutes.
- After completing the cleaning, it’s crucial to print another nozzle check pattern to ensure the problem has been resolved.
- If you notice the issue still persists, consider delving deeper with a more intensive cleaning process, but remember, this consumes more ink.
Method 12: Reset Printer
Resetting the printer often helps in resolving the Canon printer not printing issue by restoring the printer to its default settings. This process will reset the printer’s internal memory and may resolve any issues preventing it from printing.
- First, turn off the printer.
- Unplug it from the power source.
- Wait for a few minutes.
- Next, plug the printer back into the power source and turn it on.
Summing Up
Encountering the Canon printer not printing issue can be frustrating, especially when you have important documents to print. However, with the right approach and troubleshooting steps, it is possible to resolve this issue and get your printer back in working condition. We hope this guide has helped assist you in identifying and fixing the printing issue on the Canon printer printing’ problem. Remember to check the ink levels, ensure the printer settings are correct, update the drivers, and check the Print Spooler Service. With some patience and effort, your Canon printer will be back in action.
However, if you are still facing the same, then you can contact our Support team to get the issue resolved permanently. Thank You!
Frequently Asked Question
A: This could be due to several reasons, including low ink levels, a paused print queue, outdated drivers, or connectivity issues.
A: Ensure the print spooler service is running, check for paper jams, update printer drivers, and consider performing a printhead cleaning from the maintenance menu.
A: Blank pages can result from clogged nozzles, empty ink cartridges, or incorrect printer settings. Consider checking ink levels, performing a nozzle cleaning, or reviewing your print settings.